Simple and Essential DIY Bike Maintenance
Endless things could be said about the benefits of having a clean drivetrain, but the main benefit is that with a clean and well maintained drivetrain, your bike will last longer, run more efficiently and, in turn, will make you go faster (because that’s what it’s all about). Being guilty of this myself, it is a very important piece of bike maintenance that is very easily neglected. Rather than going into detail about all of the benefits, the purpose of this article will simply be to illustrate a fool proof way to wash your bike and clean your drivetrain so that it comes out spotless every single time.
Preparation
Essentials
- 1 Bucket of hot soapy water.
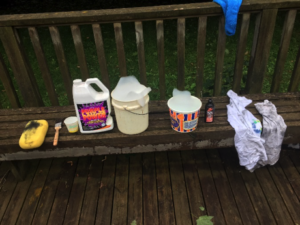
- Hot water is much more effective at removing grime and grease. I personally use dish soap just for convenience sake and has always worked for me.
- 2 Sponges (1 for the drivetrain, 1 for the rest of the bike)
- Degreaser or related cleaning solvent (around 100-200mL)
- This is used to remove the black grime and grease that, without fail, has made its way onto your legs at least once or twice while mounting/dismounting your bike.
- Degreaser tends to be relatively cheap – between $20 and $35 for a gallon which will go a LONG way if used sparingly.
- Old Paintbrush (to apply the degreaser to your drivetrain)
- Stiff cleaning brush (to scrub the grime from your drivetrain)
- A few rags (the more the merrier)
- Chain Lubricant
- Water Bottle (for rinsing)
Optional
- Bike Stand

- This isn’t really necessary as you can clean your bike just as well without a stand – it just makes things a little bit easier.
- Chain Cleaning tool
- Again, not necessary – I personally have a chain cleaning tool. It works great and is very convenient, but I can also get the chain just as clean with a stiff brush and a little elbow grease.
- Garden hose
- This is a “nice to have”, but it will essentially serve the same purpose as the water bottle
Once you have all of these things – it’s time to get started!
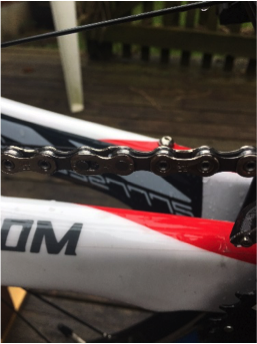
1. Inspect Chain for Wear and Damage
Before you get started cleaning, be sure to give your chain a good look for any obvious damage such as bends or cracks. Also check the chain for wear – as you ride your bike your chain is under a consistent load and over time will begin to stretch. As it does this, your shifting will become more difficult and will begin to “skip” between gears. A trick to check for chain wear is to rest a ruler or tape measure alongside the lower run of the chain and see if you can measure exactly 12 inches between 12 pins (as pictured). If the 12th pin lines up with 12 inches then you chain is good to go. If the 12th pin exceeds 12 inches by 1/8th of an inch or more, it’s time to replace.
2. Apply Degreaser to your Drivetrain
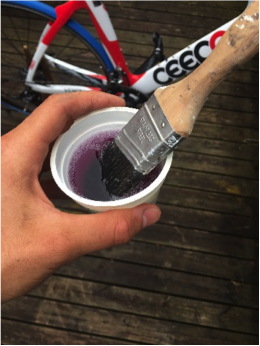
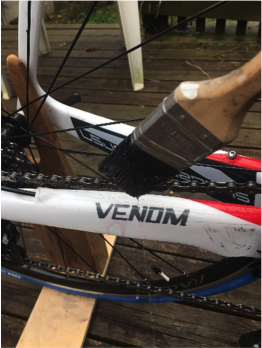 Take your chosen degreaser and pour some of it into a small container. I personally use a small yogurt container which gives me around 150mL – this should be more than enough. Use your old paintbrush to literally paint on the degreaser to your drivetrain. Make sure you get back to your derailleur and jockey wheels, up to your cassette, all along your chain and up to your cranks. Give your crank a couple of backwards spins to let the degreaser seep in between the rollers on your chain and repeat the painting process. Let this sit and work its magic for 5 – 10 minutes.
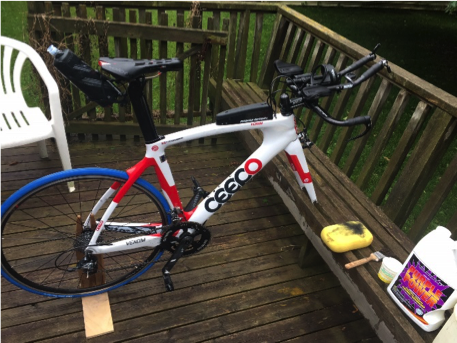
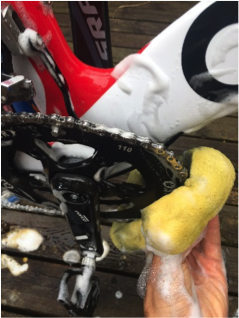
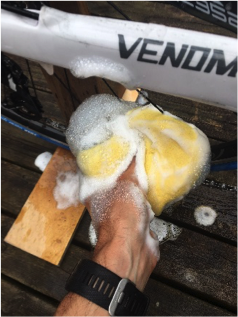
3. Wash the Rest of the Bike
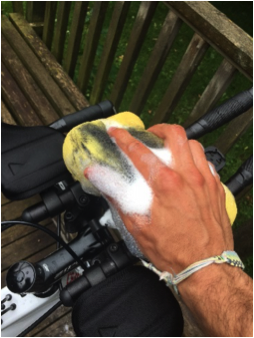 With your (hopefully still hot) bucket of soapy water and one of your sponges, just start going over the rest of your bike working from the top down. Be sure to get the hard to reach places like under the seat, the brake pads, between the forks and also between all of your spokes. Use this as an opportunity to check over your bike for any obvious things like loose cables, chips, cracks, etc. There’s really no real method to this madness, but once this part is done, the bike should look like a million bucks.
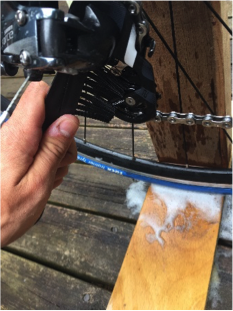
4. Clean the Drivetrain
So after 5 – 10 minutes, the degreaser you applied earlier should’ve worked its magic and loosened up all of the grease and grime from your drivetrain, now it’s just a matter of cleaning it off. Before doing this, shift gears to move your chain onto the big ring on the front – it is much easier to clean when in this position. Take your stiff brush and begin scrubbing the derailleur, jockey wheels, cassette and chain rings. Once you’ve give those a once over, pedal backwards and, with your brush hold it along the chain – this should loosen any grit and grime in between the rollers that the degreaser has lifted. Once this is done, take your second sponge and with the hot soapy water begin to wash your drivetrain. What I tend to do here is first go over the entire drivetrain once; similar to what you did with your stiff brush. Then with your sponge, hold it against the chain on your big ring and pedal backwards with your other hand. While still pedalling backwards, take your soapy sponge and CAREFULLY pinch the jockey wheels as they spin to remove any remaining grease that’s hiding back there. To finish off, grab the chain with your soapy sponge and pedal backwards. The drivetrain should be spotless right about now. You’ll be able to tell this if you take one of your rags and run it along the chain. If it’s clean, you’ve done the job right. If not, just repeat steps 2 and 4.
 |
 |
 |
 |
5. Rinse and Dry
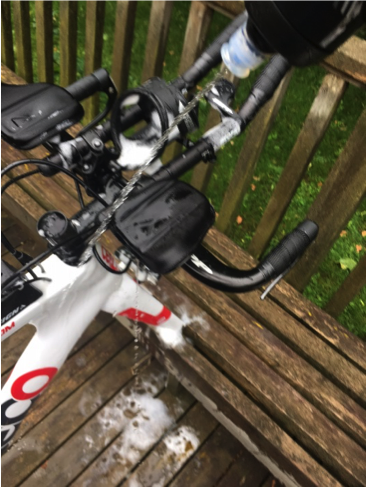 You may have to quickly sponge down once more after cleaning the drivetrain if some grease splattered on other parts of the frame. Once this is done, fill up your water bottle with water and spray onto the bike working from the top down until all of the soap is rinsed off. If you have access to a garden hose, this part if the process is much easier. Take another one of your rags and wipe down the bike until dry. When you get to the drive train, using one of the rags grab hold of the chain and pedal backwards until the chain is substantially dry. Leave the chain to air dry for another 10 or so minutes before applying the chain lubricant.
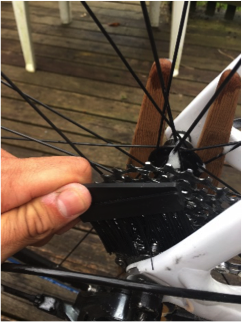
6. Lubing your Chain
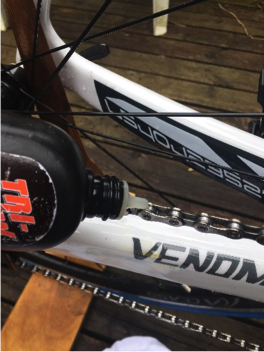 The final and probably most important step of the process. What you’ll want to do is find the “missing link” on your chain (as pictured). For most bikes this is what you use to remove the chain and is a good starting point for lubricating your chain as well. Now very carefully, apply 1 drop of lubricant to each of the rollers starting from the missing link and turning the crank as you go. Once you make your way back to the “missing link”, give your chain a few slow spins to let the lubricant work its way in between the rollers. With another one of your rags (this one should be dry) grab the chain, pedal backwards and wipe off the excess lubricant that has made its way to the outer plates. We do this because the lube serves no purpose there and will just collect dirt and dust as you ride making your chain look a lot dirtier than it actually is.
And now you’re finished! Repeat this process every couple of weeks. Your bike will now look and ride like new again. This will now hopefully give you that extra motivation to get training, go for that strava KOM, and sign up for that next MultiSport race. Looking forward to seeing some spotless bikes in transition – be sure to say hi!
See you there,
Matt Strattman